I was experimenting with different ways to get additional languages installed and configured during Windows Autopilot and it proved to be an interesting challenge. The following is what I settled on in the end and what produced the results that I wanted.
Here were my particular requirements, but you can customize this per your own need:
- The primary language should be English (United Kingdom)
- An additional secondary language of English (United States)
- Display language should be English (United Kingdom)
- Default input override should be English (United Kingdom)
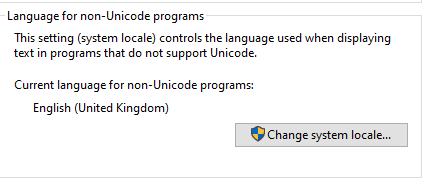
- System locale should be English (United Kingdom)
- The administrative defaults for the Welcome screen and New user accounts must have a display language, input language, format and location matching the primary language (UK / UK English)
- All optional features for the primary language should be installed (handwriting, optical character recognition, etc)
To achieve this, I basically created three elements:
- Installed the Local Experience Pack for English (United Kingdom)
- Deployed a powershell script running in administrative context that sets the administrative language defaults and system locale
- Deployed a powershell script running in user context that sets the correct order in the user preferred languages list
This was deployed during Autopilot to a Windows 10 1909 (United States) base image.
Local Experience Packs
Local Experience Packs (LXPs) are the modern way to go for installing additional languages since Windows 10 1803. These are published to the Microsoft Store and are automatically updated. They also install more quickly that the traditional cab language packs that you would install with DISM.
LXPs are available in the Microsoft Store for Business, so they can be synced with Intune and deployed as apps. However, the problem with using LXPs as apps during Autopilot is the order of things. The LXP needs to be installed before the PowerShell script that configures the language defaults runs, and since PowerShell scripts are not currently tracked in the ESP, and apps are the last thing to install in the device setup phase, the scripts will very likely run before the app is installed.
To get around that, I decided to get the LXP from the Volume Licensing Center instead. Then I uploaded this to a storage account in Azure, where it gets downloaded and installed by the PowerShell script. This way I can control the order and be sure the LXP is installed before making configuration changes.
When downloading from the VLC, be sure to select the Multilanguage option:

Then get the highlighted ISO. The 1903 LXPs work for 1909 also.

Get the applicable appx file and the license file from the ISO, zip them, and upload the zip file into an Azure Storage account.
When uploading the zip file, be sure to choose the Account Key authentication type:

Once uploaded, click on the blob and go to the Generate SAS page. Choose Read permissions, set an appropriate expiry date, then copy the Blob SAS URL. You will need this to download the file with PowerShell.

Administrative PowerShell Script
Now lets create a PowerShell script that will:
- Download and install the Local Experience Pack
- Install any optional features for the language
- Configure language and regional settings and defaults
Here’s the script I’m using for that.
A quick walkthrough:
First, I’ve entered the locale IDs for the primary and secondary languages, as well as the keyboard layout hex codes, and finally the Geo location ID for the primary language as variables.
Then we set a registry key to allow side-loading (required for older W10 versions for the install of appx/msix).
Next we download and install the LXP. You’ll need to enter the URL you copied earlier for the Azure blob, and update the zip filename as required, as well as the LXP filename.
Then we install any optional features for the primary language that aren’t already installed.
Then we define the content of an XML file that will be used to set the language and locale preferences. Obviously customize that per your requirement.
Then we save that content to a file and apply it.
Create the PowerShell script in Intune, make sure you don’t run it using the logged on credentials, and deploy it to your Autopilot AAD group.

User PowerShell Script
Now we need to create a very simple script that will run in the user context. This script simply makes sure that the list of preferred languages is in the correct order, as by default it will look like this:

This script will run for each user that logs in. It won’t run immediately so the order may be wrong when you first log in, but it doesn’t take long before it runs. Create the script in Intune, remember to run it using the logged on credentials, and deploy it to your Autopilot AAD group.

The Result
After running the Autopilot deployment and logging in, everything checks out 🙂