Update 2017-08-25 | Changed the way the output from a button click is handled, saving it to a variable instead.
The humble VBScript message box has been around for a while now and is still a useful way of providing a simple pop-up notification in Windows. I’ve used it in my PowerShell scripts as well as my UI tools and even in my ConfigMgr task sequences for providing feedback to the end user.

Both WinForms and WPF also have a message box but they have similar style and functionality to the VBScript version. In this age of modern design languages like Metro and Material Design however, this message box is starting to look a little dated. So I decided to create my own customizable message box in WPF as a PowerShell function that can be used in my scripts and UI tools.
Enter New-WPFMessageBox. My goal was to create a good-looking, fully-functional message box window that is highly customizable in the WPF format, and can even be used as a window host to display custom WPF content. The message box has a basic default design, but if you’re the creative type then you can customize away until you get an appearance you like.
Examples
Let’s have a look at some ways we can use this function.
To create a simple message box, all you need to do is pass a string to the Content parameter:
New-WPFMessageBox -Content "I'm a WPF Object!"

The Content parameter is the only mandatory parameter, and can take either a simple text string or your own custom WPF content (which we’ll look at later).
To add a header, simply use the Title parameter:
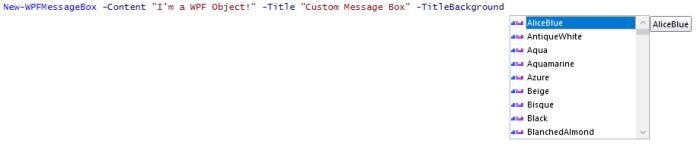
New-WPFMessageBox -Content "I'm a WPF Object!" -Title "Custom Message Box"

The title bar is a color block, so it can be used to create a nice contrast with the main content, for example. Use the TitleBackground parameter to change the color. This parameter is a dynamic parameter and will allow you to select from the list of available colors in the .Net palette.
New-WPFMessageBox -Content "I'm a WPF Object!" -Title "Custom Message Box" -TitleBackground CornflowerBlue

You can change the fonts, font weights and font sizes, as well as the background and foreground colors to create some nice combinations. The FontFamily parameter is also dynamic and allows you to select from fonts available in .Net.
The Content… parameters allow you to change the main content section, and the Title… parameters allow you to change the title.
When using several parameters, it can be easier to ‘splat’ them like so:
$Params = @{
    Content = "I'm a WPF Object!"
    Title = "Custom Message Box"
    TitleBackground = "CornflowerBlue"
    TitleFontSize = 28
    TitleFontWeight = "Bold"
    TitleTextForeground = "SpringGreen"
    ContentFontSize = 18
    ContentFontWeight = "Medium"
    ContentTextForeground = "SpringGreen"
}

New-WPFMessageBox @Params

Use ContentBackground to change the main content background:

You can change the button color using ButtonTextForeground:

The default button is the OK button, but you can also use other buttons or button combinations such as Yes/No, Retry/Cancel, Abort/Retry/Ignore etc. Simply select an option using the ButtonType parameter.
$Params = @{
    Content = "The file 'Important Document.docx' could not be deleted."
    Title = "File Deletion Error"
    TitleBackground = "LightGray"
    TitleFontSize = 28
    TitleFontWeight = "Bold"
    TitleTextForeground = "Red"
    ContentFontSize = 18
    ContentFontWeight = "Medium"
}

New-WPFMessageBox @Params -ButtonType Abort-Retry-Ignore

When a button is clicked, the text of the button is saved to a variable named WPFMessageBoxOutput so you can handle this in your code and perform different actions depending on what was clicked, eg:
New-WPFMessageBox @Params -ButtonType Abort-Retry-Ignore
If ($WPFMessageBoxOutput -eq "Abort")
{
    Exit
}
ElseIf ($WPFMessageBoxOutput -eq "Retry")
{

}
Else
{

}
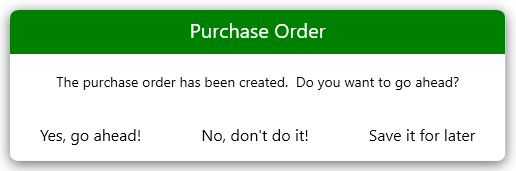
You can also add your own custom buttons. Set the ButtonType to None, and pass the text for your buttons to the CustomButtons parameter:
$Params = @{
    Content = "The purchase order has been created.  Do you want to go ahead?"
    Title = "Purchase Order"
    TitleFontSize = 20
    TitleBackground = 'Green'
    TitleTextForeground = 'White'
    ButtonType = 'None'
    CustomButtons = "Yes, go ahead!","No, don't do it!", "Save it for later"
}
New-WPFMessageBox @Params
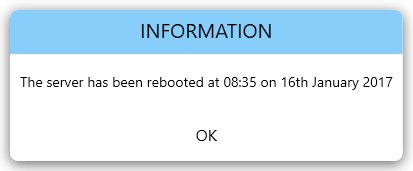
You can create Information, Warning or Error message boxes using your own style. If you define the parameters once in your script, then you can simply call them everytime you want to display that message type.
A simple informational message:
$InfoParams = @{
    Title = "INFORMATION"
    TitleFontSize = 20
    TitleBackground = 'LightSkyBlue'
    TitleTextForeground = 'Black'
}
New-WPFMessageBox @InfoParams -Content "The server has been rebooted at 08:35 on 16th January 2017"
A warning message:
$WarningParams = @{
    Title = "WARNING"
    TitleFontSize = 20
    TitleBackground = 'Orange'
    TitleTextForeground = 'Black'
}
New-WPFMessageBox @WarningParams -Content "The file could not be opened."

An error message:
$ErrorMsgParams = @{
    Title = "ERROR!"
    TitleBackground = "Red"
    TitleTextForeground = "WhiteSmoke"
    TitleFontWeight = "UltraBold"
    TitleFontSize = 20
    Sound = 'Windows Exclamation'
}
New-WPFMessageBox @ErrorMsgParams -Content "There was a problem connecting to the Exchange Server.
Please try again later."
In this one I’ve added the Sound parameter. This is a dynamic parameter allowing you to select from available Windows sounds in your local media library. The sound will be played when the message box is displayed.

Maybe you prefer a little more drama in your error message box. How about this:
$ErrorMsgParams = @{
    TitleBackground = "Red"
    TitleTextForeground = "Yellow"
    TitleFontWeight = "UltraBold"
    TitleFontSize = 28
    ContentBackground = 'Red'
    ContentFontSize = 18
    ContentTextForeground = 'White'
    ButtonTextForeground = 'White'
    Sound = 'Windows Hardware Fail'
}
$ComputerName = "DoesntExist"
Try
{
    New-PSSession -ComputerName $ComputerName -ErrorAction Stop
}
Catch
{
    New-WPFMessageBox @ErrorMsgParams -Content "$_" -Title "PSSession Error!"
}
In this code, I am using a try / catch block to catch an error, then using the message box to display it.

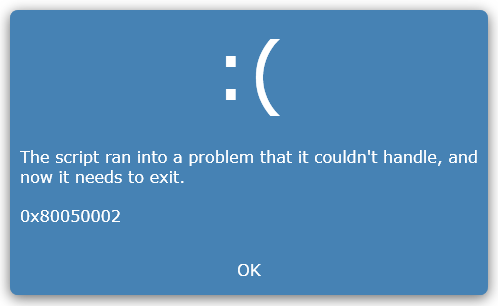
Or we can create a Windows 10 BSOD-style error:
$Params = @{
    FontFamily = 'Verdana'
    Title = ":("
    TitleFontSize = 80
    TitleTextForeground = 'White'
    TitleBackground = 'SteelBlue'
    ButtonType = 'OK'
    ContentFontSize = 16
    ContentTextForeground = 'White'
    ContentBackground = 'SteelBlue'
    ButtonTextForeground = 'White'
    BorderThickness = 0
}
New-WPFMessageBox @Params -Content "The script ran into a problem that it couldn't handle, and now it needs to exit.

0x80050002"
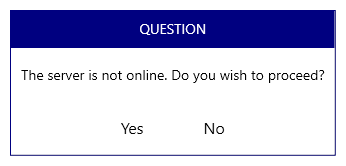
If you prefer square corners and no window shadow effect for a more basic look, try this. Here I have set the CornerRadius, ShadowDepth and BlurRadius to 0, as well as setting the BorderThickness and BorderBrush parameters to create a simple border.
$Params = @{
    Title = "QUESTION"
    TitleBackground ='Navy'
    TitleTextForeground = 'White'
    ButtonType = 'Yes-No'
    CornerRadius = 0
    ShadowDepth = 0
    BlurRadius = 0
    BorderThickness = 1
    BorderBrush = 'Navy'

}
New-WPFMessageBox @Params -Content "The server is not online. Do you wish to proceed?"
You can create some interesting effects with those parameters, such as a more circular window:
$Params = @{
    Title = "QUESTION"
    TitleBackground ='Navy'
    TitleTextForeground = 'White'
    ButtonType = 'Yes-No'
    CornerRadius = 80
    ShadowDepth = 5
    BlurRadius = 5
    BorderThickness = 1
    BorderBrush = 'Navy'

}
New-WPFMessageBox @Params -Content "The server is not online.
Do you wish to proceed?"

Timeout is a useful parameter which allows you to automatically close the message box after a number of seconds. You might want to use this in a script where you choose to continue if no response was received after a period of time. You can also use this to simply display a message without any buttons – just for information, and no response is required.
$Content = "Your mission - which we have chosen to accept for you - is to eliminate Windows XP in the enterprise.
Good luck!

This message will self-destruct in 30 seconds"

$Params = @{
    Content = $Content
    Title = "MISSION:POSSIBLE"
    TitleFontSize = 30
    TitleTextForeground = 'Red'
    TitleFontWeight = 'Bold'
    TitleBackground = 'Silver'
    FontFamily = 'Lucida Console'
    ButtonType = 'None'
    Timeout = 30
}

New-WPFMessageBox @Params

I’ve also added a couple of parameters that allow you to assign code to the Loaded or Closed events on the message box window. This means you can run code when the message box opens, or after it has closed. Simply pass a code block to the OnLoaded or OnClosed parameters. Bear in mind that any code assigned to the Loaded event should not be long running as it will block the thread until it has completed, and the message box will only display afterwards.
In this example, I have used an async method from the SpeechSynthesizer class so that the text will be spoken at the same time the window opens because it is not running in the same thread.
$Content = "We could not access the server. Do you wish to continue?"

$Code = {
    Add-Type -AssemblyName System.speech
    (New-Object System.Speech.Synthesis.SpeechSynthesizer).SpeakAsync($Content)
    }

$Params = @{
    Content = "$Content"
    Title = "ERROR"
    ContentBackground = "WhiteSmoke"
    FontFamily = "Tahoma"
    TitleFontWeight = "Heavy"
    TitleBackground = "Red"
    TitleTextForeground = "YellowGreen"
    Sound = 'Windows Message Nudge'
    ButtonType = 'Cancel-TryAgain-Continue'
    OnLoaded = $Code
}

New-WPFMessageBox @Params

Adding Custom WPF Content
As well as a simple text string, the Content parameter can accept a WPF UI element. When you pass a text string, the function simply creates a textblock element and adds the text. But if you know a little about creating WPF objects in PowerShell, you can create your own elements and add them as content to the message box. This opens up a lot of possibilities and transforms the message box into a kind of easy-to-create window host for any WPF content.
For example, instead of some text, how about displaying a picture instead?
$Source = "C:\Users\tjones\Pictures\minion.jpg"
$Image = New-Object System.Windows.Controls.Image
$Image.Source = $Source
$Image.Height = [System.Drawing.Image]::FromFile($Source).Height / 2
$Image.Width = [System.Drawing.Image]::FromFile($Source).Width / 2

New-WPFMessageBox -Content $Image -Title "Minions Rock!" -TitleBackground LightSeaGreen -TitleTextForeground Black
To set the height and width I have simply halved the dimensions of the source image file.

Maybe you want to add a text description of the picture too. In that case, create a textblock and add both the image and textblock to a layout control like a stackpanel, and pass the stackpanel as content.
$Source = "C:\Users\tjones\Pictures\minion.jpg"
$Image = New-Object System.Windows.Controls.Image
$Image.Source = $Source
$Image.Height = [System.Drawing.Image]::FromFile($Source).Height / 2
$Image.Width = [System.Drawing.Image]::FromFile($Source).Width / 2

$TextBlock = New-Object System.Windows.Controls.TextBlock
$TextBlock.Text = "My friend Robert"
$TextBlock.FontSize = "28"
$TextBlock.HorizontalAlignment = "Center"

$StackPanel = New-Object System.Windows.Controls.StackPanel
$StackPanel.AddChild($Image)
$StackPanel.AddChild($TextBlock)

New-WPFMessageBox -Content $StackPanel -Title "Minions Rock!" -TitleBackground LightSeaGreen -TitleTextForeground Black -ContentBackground LightSeaGreen

How about playing a video?
$MediaPlayer = New-Object System.Windows.Controls.MediaElement
$MediaPlayer.Height = "360"
$MediaPlayer.Width = "640"
$MediaPlayer.Source = "http://video.ch9.ms/ch9/5e56/5148ed00-c3cc-4d1b-a0e0-3f9cbfbb5e56/EmpoerBusinesstodoGreatThings.mp4"

New-WPFMessageBox -Content $MediaPlayer -Title "Windows 10 In The Enterprise"

$MediaPlayer.LoadedBehavior = "Manual"
$MediaPlayer.Stop()

We could also add some buttons to control playback. I’ve added the buttons to a dockpanel, added both the video player and the dockpanel to a stackpanel, as use the stackpanel as content.
# Create a Media Element
$MediaPlayer = New-Object System.Windows.Controls.MediaElement
$MediaPlayer.Height = "360"
$MediaPlayer.Width = "640"
$MediaPlayer.LoadedBehavior = "Manual"
$MediaPlayer.Source = "http://video.ch9.ms/ch9/5e56/5148ed00-c3cc-4d1b-a0e0-3f9cbfbb5e56/EmpoerBusinesstodoGreatThings.mp4"

# Add a start button
$StartButton = New-Object System.Windows.Controls.Button
$StartButton.Content = "Start"
$StartButton.FontSize = 22
$StartButton.Width = "NaN"
$StartButton.Height = "NaN"
$StartButton.VerticalContentAlignment = "Center"
$StartButton.HorizontalContentAlignment = "Center"
$StartButton.HorizontalAlignment = "Center"
$StartButton.VerticalAlignment = "Center"
$StartButton.Background = "Transparent"
$StartButton.Margin = "0,5,15,0"
$StartButton.Padding = 10
$StartButton.Cursor = "Hand"
$StartButton.Add_Click({
    $MediaPlayer.Play()
})

# Add a stop button
$StopButton = New-Object System.Windows.Controls.Button
$StopButton.Content = "Stop"
$StopButton.FontSize = 22
$StopButton.Width = "NaN"
$StopButton.Height = "NaN"
$StopButton.VerticalContentAlignment = "Center"
$StopButton.HorizontalContentAlignment = "Center"
$StopButton.HorizontalAlignment = "Center"
$StopButton.VerticalAlignment = "Center"
$StopButton.Background = "Transparent"
$StopButton.Margin = "15,5,0,0"
$StopButton.Padding = 10
$StopButton.Cursor = "Hand"
$StopButton.Add_Click({
    $MediaPlayer.Stop()
})

# Add a pause button
$PauseButton = New-Object System.Windows.Controls.Button
$PauseButton.Content = "Pause"
$PauseButton.FontSize = 22
$PauseButton.Width = "NaN"
$PauseButton.Height = "NaN"
$PauseButton.VerticalContentAlignment = "Center"
$PauseButton.HorizontalContentAlignment = "Center"
$PauseButton.HorizontalAlignment = "Center"
$PauseButton.VerticalAlignment = "Center"
$PauseButton.Background = "Transparent"
$PauseButton.Margin = "15,5,15,0"
$PauseButton.Padding = 10
$PauseButton.Cursor = "Hand"
$PauseButton.Add_Click({
    $MediaPlayer.Pause()
})

# Add buttons to a dock panel
$DockPanel = New-object System.Windows.Controls.DockPanel
$DockPanel.LastChildFill = $False
$DockPanel.HorizontalAlignment = "Center"
$DockPanel.Width = "NaN"
$DockPanel.AddChild($StartButton)
$DockPanel.AddChild($PauseButton)
$DockPanel.AddChild($StopButton)

# Add dock panel and media player to a stackpanel
$StackPanel = New-object System.Windows.Controls.StackPanel
$StackPanel.AddChild($MediaPlayer)
$StackPanel.AddChild($DockPanel)

New-WPFMessageBox -Content $StackPanel -Title "Windows 10 In The Enterprise"

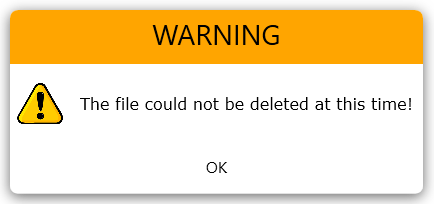
Although I haven’t included any icons or images for message types like warning or error etc, you could still add your own using custom content:
$Image = New-Object System.Windows.Controls.Image
$Image.Source = "http://www.asistosgb.com/wp-content/uploads/2017/05/attent.png"
$Image.Height = 50
$Image.Width = 50
$Image.Margin = 5

$TextBlock = New-Object System.Windows.Controls.TextBlock
$TextBlock.Text = "The file could not be deleted at this time!"
$TextBlock.Padding = 10
$TextBlock.FontFamily = "Verdana"
$TextBlock.FontSize = 16
$TextBlock.VerticalAlignment = "Center"

$StackPanel = New-Object System.Windows.Controls.StackPanel
$StackPanel.Orientation = "Horizontal"
$StackPanel.AddChild($Image)
$StackPanel.AddChild($TextBlock)

New-WPFMessageBox -Content $StackPanel -Title "WARNING" -TitleFontSize 28 -TitleBackground Orange
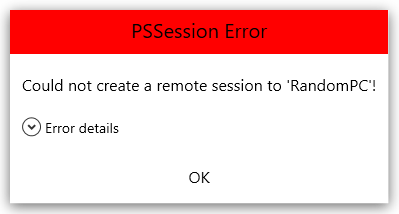
How about including an expander for an error message box, with the error details available for viewing when expanded?
$ComputerName = "RandomPC"
Try
{
    New-PSSession -ComputerName $ComputerName -ErrorAction Stop
}
Catch
{

    # Create a text box
    $TextBox = New-Object System.Windows.Controls.TextBox
    $TextBox.Text = "Could not create a remote session to '$ComputerName'!"
    $TextBox.Padding = 5
    $TextBox.Margin = 5
    $TextBox.BorderThickness = 0
    $TextBox.FontSize = 16
    $TextBox.Width = "NaN"
    $TextBox.IsReadOnly = $True

    # Create an exander
    $Expander = New-Object System.Windows.Controls.Expander
    $Expander.Header = "Error details"
    $Expander.FontSize = 14
    $Expander.Padding = 5
    $Expander.Margin = "5,5,5,0"

    # Bind the expander width to the text box width, so the message box width does not change when expanded
    $Binding = New-Object System.Windows.Data.Binding
    $Binding.Path = [System.Windows.Controls.TextBox]::ActualWidthProperty
    $Binding.Mode = [System.Windows.Data.BindingMode]::OneWay
    $Binding.Source = $TextBox
    [void]$Expander.SetBinding([System.Windows.Controls.Expander]::WidthProperty,$Binding)

    # Create a textbox for the expander
    $ExpanderTextBox = New-Object System.Windows.Controls.TextBox
    $ExpanderTextBox.Text = "$_"
    $ExpanderTextBox.Padding = 5
    $ExpanderTextBox.BorderThickness = 0
    $ExpanderTextBox.FontSize = 16
    $ExpanderTextBox.TextWrapping = "Wrap"
    $ExpanderTextBox.IsReadOnly = $True
    $Expander.Content = $ExpanderTextBox

    # Assemble controls into a stackpanel
    $StackPanel = New-Object System.Windows.Controls.StackPanel
    $StackPanel.AddChild($TextBox)
    $StackPanel.AddChild($Expander)

    # Using no rounded corners as they do not stay true when the window resizes
    New-WPFMessageBox -Content $StackPanel -Title "PSSession Error" -TitleBackground Red -TitleFontSize 20 -Sound 'Windows Unlock' -CornerRadius 0
}

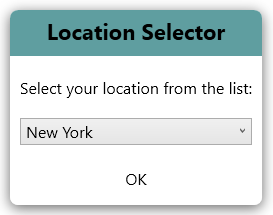
You can also ask the user for input and return the results to a variable in the containing script. For example, here I am simply asking the user to select an option from a drop-down list. The selection will be saved to a variable that can be used later in the script.
Add-Type -AssemblyName PresentationFramework

# Define the location list
$Array = @(
    "London"
    "Paris"
    "New York"
    "Tokyo"
)

# Create a stackpanel container
$StackPanel = New-Object System.Windows.Controls.StackPanel

# Create a combobox
$ComboBox = New-Object System.Windows.Controls.ComboBox
$ComboBox.ItemsSource = $Array
$ComboBox.Margin = "10,10,10,0"
$ComboBox.Background = "White"
$ComboBox.FontSize = 16

# Create a textblock
$TextBlock = New-Object System.Windows.Controls.TextBlock
$TextBlock.Text = "Select your location from the list:"
$TextBlock.Margin = 10
$TextBlock.FontSize = 16

# Assemble the stackpanel
$TextBlock, $ComboBox | foreach {
    $StackPanel.AddChild($PSItem)
}

$Params = @{
    Content = $StackPanel
    Title = "Location Selector"
    TitleFontSize = 22
    TitleFontWeight = "Bold"
    TitleBackground = "CadetBlue"
}

# Display the message
New-WPFMessageBox @Params

# Set the variable from the selected value
$Location = $ComboBox.SelectedValue
If your script returns data in table format, how about using a WPF datagrid to display it in a nicer way? You can populate a datagrid from an array, but I recommend converting to a datatable object as it’s a type that fully supports the features of the datagrid.
In this example, I’m simply displaying services on my system from the Get-Service cmdlet.
# Get Services
$Fields = @(
    'Status'
    'DisplayName'
    'ServiceName'
)
$Services = Get-Service | Select $Fields

# Add Services to a datatable
$Datatable = New-Object System.Data.DataTable
[void]$Datatable.Columns.AddRange($Fields)
foreach ($Service in $Services)
{
    $Array = @()
    Foreach ($Field in $Fields)
    {
        $array += $Service.$Field
    }
    [void]$Datatable.Rows.Add($array)
}

# Create a datagrid object and populate with datatable
$DataGrid = New-Object System.Windows.Controls.DataGrid
$DataGrid.ItemsSource = $Datatable.DefaultView
$DataGrid.MaxHeight = 500
$DataGrid.MaxWidth = 500
$DataGrid.CanUserAddRows = $False
$DataGrid.IsReadOnly = $True
$DataGrid.GridLinesVisibility = "None"

$Params = @{
    Content = $DataGrid
    Title = "Services on $Env:COMPUTERNAME"
    ContentBackground = "WhiteSmoke"
    FontFamily = "Tahoma"
    TitleFontWeight = "Heavy"
    TitleBackground = "LightSteelBlue"
    TitleTextForeground = "Black"
    Sound = 'Windows Message Nudge'
    ContentTextForeground = "DarkSlateGray"
}
New-WPFMessageBox @Params

How about using a TreeView object to group the services by status?
$TreeView = New-Object System.Windows.Controls.TreeView
$TreeView.MaxHeight = 500
$TreeView.Height = 400
$TreeView.Width = 400
$TreeView.BorderThickness = 0
"Running","Stopped" | foreach {
    $Item = New-Object System.Windows.Controls.TreeViewItem
    $Item.Padding = 5
    $Item.FontSize = 16
    $Item.Header = $_
    [void]$TreeView.Items.Add($Item)
}
$TreeView.Items[0].ItemsSource = Get-Service | Where {$_.Status -eq "Running"} | Select -ExpandProperty DisplayName
$TreeView.Items[1].ItemsSource = Get-Service | Where {$_.Status -eq "Stopped"} | Select -ExpandProperty DisplayName

New-WPFMessageBox -Content $TreeView -Title "Services by Status" -TitleBackground "LightSteelBlue"

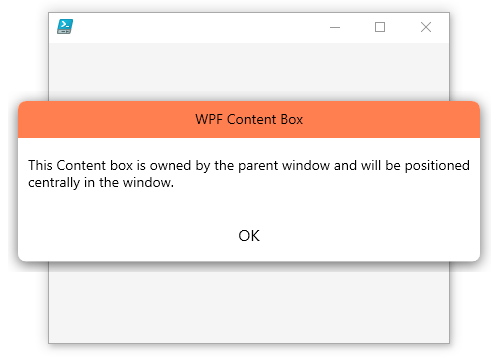
If you want to use the message box function in your own WPF UI tool, then you can use the WindowHost parameter to pass the host window object. This will make the host window owner of the message box window, and means your message box will always display centered in the host window, no matter the size or location of the window.
In this example I have created a simple host window with a big “Click Me” button. When clicked, a message box will display.
$Window = New-object System.Windows.Window
$Window.WindowStartupLocation = "CenterScreen"
$Window.SizeToContent="WidthAndHeight"
$Button = New-Object System.Windows.Controls.Button
$Button.Content = "Click Me!"
$Button.FontSize = 28
$Button.HorizontalAlignment = "Center"
$Button.VerticalAlignment = "Center"
$Button.Height = 300
$Button.Width = "400"
$Button.Background = "WhiteSmoke"
$Button.BorderThickness = 0
$Window.AddChild($Button)

$Button.Add_Click({
    New-WPFMessageBox -Content "This Content box is owned by the parent window and will be positioned centrally in the window." -Title "WPF Content Box" -TitleBackground Coral -WindowHost $Window
})

$Window.ShowDialog()

My final example is a bit more advanced, but it demonstrates how the message box could be used in a more dynamic way to display output from code running in a background job.
I’ve created a stackpanel from XAML code containing a textbox and a button. These are all added to a synchronized hash table which gets passed, together with a code block, to a new PowerShell instance which runs in the background. The code block simply pings a list of computers in succession and updates the textbox in real time with the result of each ping.
The background job is triggered by the “Begin” button.
# XAML code
[XML]$Xaml = @"
<StackPanel xmlns="http://schemas.microsoft.com/winfx/2006/xaml/presentation" xmlns:x="http://schemas.microsoft.com/winfx/2006/xaml" >
    <TextBox ScrollViewer.VerticalScrollBarVisibility="Auto" ScrollViewer.HorizontalScrollBarVisibility="Auto" Name="TextBox" Width="400" Height="200" Text="" BorderThickness="0" FontSize="18" TextWrapping="Wrap" FontFamily="Arial" IsReadOnly="True" Padding="5"/>
    <Button Name="Button" Content="Begin" Background="White" FontSize="24" HorizontalAlignment="Center" Cursor="Hand" />
</StackPanel>
"@

# Create the WPF object from the XAML code
$ChildElement = [Windows.Markup.XamlReader]::Load((New-Object -TypeName System.Xml.XmlNodeReader -ArgumentList $xaml))

# Create a synchronised hashtable and add elements to it
$UI = [System.Collections.Hashtable]::Synchronized(@{})
$UI.ChildElement = $ChildElement
$UI.TextBox = $ChildElement.FindName('TextBox')
$UI.Button = $ChildElement.FindName('Button')

# Define the code to run in a background job
$Code = {
    Param($UI)

    # Disable the button during run
    $UI.TextBox.Dispatcher.Invoke({
        $UI.Button.IsEnabled=$False
        $UI.Button.Foreground="Gray"
    })

    # Ping IP addresses
    10..20 | foreach {
        $Index = $_
        $IPaddress = "10.25.24.$Index"
        If (Test-Connection -ComputerName $IPaddress -Count 1 -Quiet)
        {
            $UI.TextBox.Dispatcher.Invoke({
                $UI.TextBox.Text = $UI.TextBox.Text + "`n" + "$IPAddress is online"
                $UI.TextBox.ScrollToEnd()
            })
        }
        Else
        {
            $UI.TextBox.Dispatcher.Invoke({
                $UI.TextBox.Text = $UI.TextBox.Text + "`n" + "$IPAddress could not be contacted"
                $UI.TextBox.ScrollToEnd()
            })
        }
    }

    # Re-enable button
    $UI.TextBox.Dispatcher.Invoke({
        $UI.Button.IsEnabled=$True
        $UI.Button.Foreground="Black"
    })
}

# Define the code to run when the button is clicked
$UI.Button.Add_Click({

    # Spin up a powershell instance and run the code
    $PowerShell = [powershell]::Create()
    $PowerShell.AddScript($Code)
    $PowerShell.AddArgument($UI)
    $PowerShell.BeginInvoke()

})

New-WPFMessageBox -Title "Test-Connection Log Window" -Content $ChildElement
You could also run the code automatically when the message box opens by using the OnLoaded parameter, or by subscribing to the Loaded event on one of the UI elements instead of the button click, eg:
$UI.TextBox.Add_Loaded({

    # Spin up a powershell instance and run the code
    $PowerShell = [powershell]::Create()
    $PowerShell.AddScript($Code)
    $PowerShell.AddArgument($UI)
    $PowerShell.BeginInvoke()

})

# or...

$OnLoadedCode = {

    # Spin up a powershell instance and run the code
    $PowerShell = [powershell]::Create()
    $PowerShell.AddScript($Code)
    $PowerShell.AddArgument($UI)
    $PowerShell.BeginInvoke()

}

New-WPFMessageBox -Title "Test-Connection Log Window" -Content $ChildElement -OnLoaded $OnLoadedCode<span id="mce_SELREST_start" style="overflow:hidden;line-height:0;"></span>
And I’m done. Try it out!
Btw, here’s the code 🙂
This file contains hidden or bidirectional Unicode text that may be interpreted or compiled differently than what appears below. To review, open the file in an editor that reveals hidden Unicode characters.
Learn more about bidirectional Unicode characters
| Function New-WPFMessageBox { | |
| # For examples for use, see my blog: | |
| # https://smsagent.wordpress.com/2017/08/24/a-customisable-wpf-messagebox-for-powershell/ | |
| # CHANGES | |
| # 2017-09-11 – Added some required assemblies in the dynamic parameters to avoid errors when run from the PS console host. | |
| # Define Parameters | |
| [CmdletBinding()] | |
| Param | |
| ( | |
| # The popup Content | |
| [Parameter(Mandatory=$True,Position=0)] | |
| [Object]$Content, | |
| # The window title | |
| [Parameter(Mandatory=$false,Position=1)] | |
| [string]$Title, | |
| # The buttons to add | |
| [Parameter(Mandatory=$false,Position=2)] | |
| [ValidateSet('OK','OK-Cancel','Abort-Retry-Ignore','Yes-No-Cancel','Yes-No','Retry-Cancel','Cancel-TryAgain-Continue','None')] | |
| [array]$ButtonType = 'OK', | |
| # The buttons to add | |
| [Parameter(Mandatory=$false,Position=3)] | |
| [array]$CustomButtons, | |
| # Content font size | |
| [Parameter(Mandatory=$false,Position=4)] | |
| [int]$ContentFontSize = 14, | |
| # Title font size | |
| [Parameter(Mandatory=$false,Position=5)] | |
| [int]$TitleFontSize = 14, | |
| # BorderThickness | |
| [Parameter(Mandatory=$false,Position=6)] | |
| [int]$BorderThickness = 0, | |
| # CornerRadius | |
| [Parameter(Mandatory=$false,Position=7)] | |
| [int]$CornerRadius = 8, | |
| # ShadowDepth | |
| [Parameter(Mandatory=$false,Position=8)] | |
| [int]$ShadowDepth = 3, | |
| # BlurRadius | |
| [Parameter(Mandatory=$false,Position=9)] | |
| [int]$BlurRadius = 20, | |
| # WindowHost | |
| [Parameter(Mandatory=$false,Position=10)] | |
| [object]$WindowHost, | |
| # Timeout in seconds, | |
| [Parameter(Mandatory=$false,Position=11)] | |
| [int]$Timeout, | |
| # Code for Window Loaded event, | |
| [Parameter(Mandatory=$false,Position=12)] | |
| [scriptblock]$OnLoaded, | |
| # Code for Window Closed event, | |
| [Parameter(Mandatory=$false,Position=13)] | |
| [scriptblock]$OnClosed | |
| ) | |
| # Dynamically Populated parameters | |
| DynamicParam { | |
| # Add assemblies for use in PS Console | |
| Add-Type -AssemblyName System.Drawing, PresentationCore | |
| # ContentBackground | |
| $ContentBackground = 'ContentBackground' | |
| $AttributeCollection = New-Object System.Collections.ObjectModel.Collection[System.Attribute] | |
| $ParameterAttribute = New-Object System.Management.Automation.ParameterAttribute | |
| $ParameterAttribute.Mandatory = $False | |
| $AttributeCollection.Add($ParameterAttribute) | |
| $RuntimeParameterDictionary = New-Object System.Management.Automation.RuntimeDefinedParameterDictionary | |
| $arrSet = [System.Drawing.Brushes] | Get-Member -Static -MemberType Property | Select -ExpandProperty Name | |
| $ValidateSetAttribute = New-Object System.Management.Automation.ValidateSetAttribute($arrSet) | |
| $AttributeCollection.Add($ValidateSetAttribute) | |
| $PSBoundParameters.ContentBackground = "White" | |
| $RuntimeParameter = New-Object System.Management.Automation.RuntimeDefinedParameter($ContentBackground, [string], $AttributeCollection) | |
| $RuntimeParameterDictionary.Add($ContentBackground, $RuntimeParameter) | |
| # FontFamily | |
| $FontFamily = 'FontFamily' | |
| $AttributeCollection = New-Object System.Collections.ObjectModel.Collection[System.Attribute] | |
| $ParameterAttribute = New-Object System.Management.Automation.ParameterAttribute | |
| $ParameterAttribute.Mandatory = $False | |
| $AttributeCollection.Add($ParameterAttribute) | |
| $arrSet = [System.Drawing.FontFamily]::Families.Name | Select -Skip 1 | |
| $ValidateSetAttribute = New-Object System.Management.Automation.ValidateSetAttribute($arrSet) | |
| $AttributeCollection.Add($ValidateSetAttribute) | |
| $RuntimeParameter = New-Object System.Management.Automation.RuntimeDefinedParameter($FontFamily, [string], $AttributeCollection) | |
| $RuntimeParameterDictionary.Add($FontFamily, $RuntimeParameter) | |
| $PSBoundParameters.FontFamily = "Segoe UI" | |
| # TitleFontWeight | |
| $TitleFontWeight = 'TitleFontWeight' | |
| $AttributeCollection = New-Object System.Collections.ObjectModel.Collection[System.Attribute] | |
| $ParameterAttribute = New-Object System.Management.Automation.ParameterAttribute | |
| $ParameterAttribute.Mandatory = $False | |
| $AttributeCollection.Add($ParameterAttribute) | |
| $arrSet = [System.Windows.FontWeights] | Get-Member -Static -MemberType Property | Select -ExpandProperty Name | |
| $ValidateSetAttribute = New-Object System.Management.Automation.ValidateSetAttribute($arrSet) | |
| $AttributeCollection.Add($ValidateSetAttribute) | |
| $PSBoundParameters.TitleFontWeight = "Normal" | |
| $RuntimeParameter = New-Object System.Management.Automation.RuntimeDefinedParameter($TitleFontWeight, [string], $AttributeCollection) | |
| $RuntimeParameterDictionary.Add($TitleFontWeight, $RuntimeParameter) | |
| # ContentFontWeight | |
| $ContentFontWeight = 'ContentFontWeight' | |
| $AttributeCollection = New-Object System.Collections.ObjectModel.Collection[System.Attribute] | |
| $ParameterAttribute = New-Object System.Management.Automation.ParameterAttribute | |
| $ParameterAttribute.Mandatory = $False | |
| $AttributeCollection.Add($ParameterAttribute) | |
| $arrSet = [System.Windows.FontWeights] | Get-Member -Static -MemberType Property | Select -ExpandProperty Name | |
| $ValidateSetAttribute = New-Object System.Management.Automation.ValidateSetAttribute($arrSet) | |
| $AttributeCollection.Add($ValidateSetAttribute) | |
| $PSBoundParameters.ContentFontWeight = "Normal" | |
| $RuntimeParameter = New-Object System.Management.Automation.RuntimeDefinedParameter($ContentFontWeight, [string], $AttributeCollection) | |
| $RuntimeParameterDictionary.Add($ContentFontWeight, $RuntimeParameter) | |
| # ContentTextForeground | |
| $ContentTextForeground = 'ContentTextForeground' | |
| $AttributeCollection = New-Object System.Collections.ObjectModel.Collection[System.Attribute] | |
| $ParameterAttribute = New-Object System.Management.Automation.ParameterAttribute | |
| $ParameterAttribute.Mandatory = $False | |
| $AttributeCollection.Add($ParameterAttribute) | |
| $arrSet = [System.Drawing.Brushes] | Get-Member -Static -MemberType Property | Select -ExpandProperty Name | |
| $ValidateSetAttribute = New-Object System.Management.Automation.ValidateSetAttribute($arrSet) | |
| $AttributeCollection.Add($ValidateSetAttribute) | |
| $PSBoundParameters.ContentTextForeground = "Black" | |
| $RuntimeParameter = New-Object System.Management.Automation.RuntimeDefinedParameter($ContentTextForeground, [string], $AttributeCollection) | |
| $RuntimeParameterDictionary.Add($ContentTextForeground, $RuntimeParameter) | |
| # TitleTextForeground | |
| $TitleTextForeground = 'TitleTextForeground' | |
| $AttributeCollection = New-Object System.Collections.ObjectModel.Collection[System.Attribute] | |
| $ParameterAttribute = New-Object System.Management.Automation.ParameterAttribute | |
| $ParameterAttribute.Mandatory = $False | |
| $AttributeCollection.Add($ParameterAttribute) | |
| $arrSet = [System.Drawing.Brushes] | Get-Member -Static -MemberType Property | Select -ExpandProperty Name | |
| $ValidateSetAttribute = New-Object System.Management.Automation.ValidateSetAttribute($arrSet) | |
| $AttributeCollection.Add($ValidateSetAttribute) | |
| $PSBoundParameters.TitleTextForeground = "Black" | |
| $RuntimeParameter = New-Object System.Management.Automation.RuntimeDefinedParameter($TitleTextForeground, [string], $AttributeCollection) | |
| $RuntimeParameterDictionary.Add($TitleTextForeground, $RuntimeParameter) | |
| # BorderBrush | |
| $BorderBrush = 'BorderBrush' | |
| $AttributeCollection = New-Object System.Collections.ObjectModel.Collection[System.Attribute] | |
| $ParameterAttribute = New-Object System.Management.Automation.ParameterAttribute | |
| $ParameterAttribute.Mandatory = $False | |
| $AttributeCollection.Add($ParameterAttribute) | |
| $arrSet = [System.Drawing.Brushes] | Get-Member -Static -MemberType Property | Select -ExpandProperty Name | |
| $ValidateSetAttribute = New-Object System.Management.Automation.ValidateSetAttribute($arrSet) | |
| $AttributeCollection.Add($ValidateSetAttribute) | |
| $PSBoundParameters.BorderBrush = "Black" | |
| $RuntimeParameter = New-Object System.Management.Automation.RuntimeDefinedParameter($BorderBrush, [string], $AttributeCollection) | |
| $RuntimeParameterDictionary.Add($BorderBrush, $RuntimeParameter) | |
| # TitleBackground | |
| $TitleBackground = 'TitleBackground' | |
| $AttributeCollection = New-Object System.Collections.ObjectModel.Collection[System.Attribute] | |
| $ParameterAttribute = New-Object System.Management.Automation.ParameterAttribute | |
| $ParameterAttribute.Mandatory = $False | |
| $AttributeCollection.Add($ParameterAttribute) | |
| $arrSet = [System.Drawing.Brushes] | Get-Member -Static -MemberType Property | Select -ExpandProperty Name | |
| $ValidateSetAttribute = New-Object System.Management.Automation.ValidateSetAttribute($arrSet) | |
| $AttributeCollection.Add($ValidateSetAttribute) | |
| $PSBoundParameters.TitleBackground = "White" | |
| $RuntimeParameter = New-Object System.Management.Automation.RuntimeDefinedParameter($TitleBackground, [string], $AttributeCollection) | |
| $RuntimeParameterDictionary.Add($TitleBackground, $RuntimeParameter) | |
| # ButtonTextForeground | |
| $ButtonTextForeground = 'ButtonTextForeground' | |
| $AttributeCollection = New-Object System.Collections.ObjectModel.Collection[System.Attribute] | |
| $ParameterAttribute = New-Object System.Management.Automation.ParameterAttribute | |
| $ParameterAttribute.Mandatory = $False | |
| $AttributeCollection.Add($ParameterAttribute) | |
| $arrSet = [System.Drawing.Brushes] | Get-Member -Static -MemberType Property | Select -ExpandProperty Name | |
| $ValidateSetAttribute = New-Object System.Management.Automation.ValidateSetAttribute($arrSet) | |
| $AttributeCollection.Add($ValidateSetAttribute) | |
| $PSBoundParameters.ButtonTextForeground = "Black" | |
| $RuntimeParameter = New-Object System.Management.Automation.RuntimeDefinedParameter($ButtonTextForeground, [string], $AttributeCollection) | |
| $RuntimeParameterDictionary.Add($ButtonTextForeground, $RuntimeParameter) | |
| # Sound | |
| $Sound = 'Sound' | |
| $AttributeCollection = New-Object System.Collections.ObjectModel.Collection[System.Attribute] | |
| $ParameterAttribute = New-Object System.Management.Automation.ParameterAttribute | |
| $ParameterAttribute.Mandatory = $False | |
| #$ParameterAttribute.Position = 14 | |
| $AttributeCollection.Add($ParameterAttribute) | |
| $arrSet = (Get-ChildItem "$env:SystemDrive\Windows\Media" -Filter Windows* | Select -ExpandProperty Name).Replace('.wav','') | |
| $ValidateSetAttribute = New-Object System.Management.Automation.ValidateSetAttribute($arrSet) | |
| $AttributeCollection.Add($ValidateSetAttribute) | |
| $RuntimeParameter = New-Object System.Management.Automation.RuntimeDefinedParameter($Sound, [string], $AttributeCollection) | |
| $RuntimeParameterDictionary.Add($Sound, $RuntimeParameter) | |
| return $RuntimeParameterDictionary | |
| } | |
| Begin { | |
| Add-Type -AssemblyName PresentationFramework | |
| } | |
| Process { | |
| # Define the XAML markup | |
| [XML]$Xaml = @" | |
| <Window | |
| xmlns="http://schemas.microsoft.com/winfx/2006/xaml/presentation" | |
| xmlns:x="http://schemas.microsoft.com/winfx/2006/xaml" | |
| x:Name="Window" Title="" SizeToContent="WidthAndHeight" WindowStartupLocation="CenterScreen" WindowStyle="None" ResizeMode="NoResize" AllowsTransparency="True" Background="Transparent" Opacity="1"> | |
| <Window.Resources> | |
| <Style TargetType="{x:Type Button}"> | |
| <Setter Property="Template"> | |
| <Setter.Value> | |
| <ControlTemplate TargetType="Button"> | |
| <Border> | |
| <Grid Background="{TemplateBinding Background}"> | |
| <ContentPresenter /> | |
| </Grid> | |
| </Border> | |
| </ControlTemplate> | |
| </Setter.Value> | |
| </Setter> | |
| </Style> | |
| </Window.Resources> | |
| <Border x:Name="MainBorder" Margin="10" CornerRadius="$CornerRadius" BorderThickness="$BorderThickness" BorderBrush="$($PSBoundParameters.BorderBrush)" Padding="0" > | |
| <Border.Effect> | |
| <DropShadowEffect x:Name="DSE" Color="Black" Direction="270" BlurRadius="$BlurRadius" ShadowDepth="$ShadowDepth" Opacity="0.6" /> | |
| </Border.Effect> | |
| <Border.Triggers> | |
| <EventTrigger RoutedEvent="Window.Loaded"> | |
| <BeginStoryboard> | |
| <Storyboard> | |
| <DoubleAnimation Storyboard.TargetName="DSE" Storyboard.TargetProperty="ShadowDepth" From="0" To="$ShadowDepth" Duration="0:0:1" AutoReverse="False" /> | |
| <DoubleAnimation Storyboard.TargetName="DSE" Storyboard.TargetProperty="BlurRadius" From="0" To="$BlurRadius" Duration="0:0:1" AutoReverse="False" /> | |
| </Storyboard> | |
| </BeginStoryboard> | |
| </EventTrigger> | |
| </Border.Triggers> | |
| <Grid > | |
| <Border Name="Mask" CornerRadius="$CornerRadius" Background="$($PSBoundParameters.ContentBackground)" /> | |
| <Grid x:Name="Grid" Background="$($PSBoundParameters.ContentBackground)"> | |
| <Grid.OpacityMask> | |
| <VisualBrush Visual="{Binding ElementName=Mask}"/> | |
| </Grid.OpacityMask> | |
| <StackPanel Name="StackPanel" > | |
| <TextBox Name="TitleBar" IsReadOnly="True" IsHitTestVisible="False" Text="$Title" Padding="10" FontFamily="$($PSBoundParameters.FontFamily)" FontSize="$TitleFontSize" Foreground="$($PSBoundParameters.TitleTextForeground)" FontWeight="$($PSBoundParameters.TitleFontWeight)" Background="$($PSBoundParameters.TitleBackground)" HorizontalAlignment="Stretch" VerticalAlignment="Center" Width="Auto" HorizontalContentAlignment="Center" BorderThickness="0"/> | |
| <DockPanel Name="ContentHost" Margin="0,10,0,10" > | |
| </DockPanel> | |
| <DockPanel Name="ButtonHost" LastChildFill="False" HorizontalAlignment="Center" > | |
| </DockPanel> | |
| </StackPanel> | |
| </Grid> | |
| </Grid> | |
| </Border> | |
| </Window> | |
| "@ | |
| [XML]$ButtonXaml = @" | |
| <Button xmlns="http://schemas.microsoft.com/winfx/2006/xaml/presentation" xmlns:x="http://schemas.microsoft.com/winfx/2006/xaml" Width="Auto" Height="30" FontFamily="Segui" FontSize="16" Background="Transparent" Foreground="White" BorderThickness="1" Margin="10" Padding="20,0,20,0" HorizontalAlignment="Right" Cursor="Hand"/> | |
| "@ | |
| [XML]$ButtonTextXaml = @" | |
| <TextBlock xmlns="http://schemas.microsoft.com/winfx/2006/xaml/presentation" xmlns:x="http://schemas.microsoft.com/winfx/2006/xaml" FontFamily="$($PSBoundParameters.FontFamily)" FontSize="16" Background="Transparent" Foreground="$($PSBoundParameters.ButtonTextForeground)" Padding="20,5,20,5" HorizontalAlignment="Center" VerticalAlignment="Center"/> | |
| "@ | |
| [XML]$ContentTextXaml = @" | |
| <TextBlock xmlns="http://schemas.microsoft.com/winfx/2006/xaml/presentation" xmlns:x="http://schemas.microsoft.com/winfx/2006/xaml" Text="$Content" Foreground="$($PSBoundParameters.ContentTextForeground)" DockPanel.Dock="Right" HorizontalAlignment="Center" VerticalAlignment="Center" FontFamily="$($PSBoundParameters.FontFamily)" FontSize="$ContentFontSize" FontWeight="$($PSBoundParameters.ContentFontWeight)" TextWrapping="Wrap" Height="Auto" MaxWidth="500" MinWidth="50" Padding="10"/> | |
| "@ | |
| # Load the window from XAML | |
| $Window = [Windows.Markup.XamlReader]::Load((New-Object -TypeName System.Xml.XmlNodeReader -ArgumentList $xaml)) | |
| # Custom function to add a button | |
| Function Add-Button { | |
| Param($Content) | |
| $Button = [Windows.Markup.XamlReader]::Load((New-Object -TypeName System.Xml.XmlNodeReader -ArgumentList $ButtonXaml)) | |
| $ButtonText = [Windows.Markup.XamlReader]::Load((New-Object -TypeName System.Xml.XmlNodeReader -ArgumentList $ButtonTextXaml)) | |
| $ButtonText.Text = "$Content" | |
| $Button.Content = $ButtonText | |
| $Button.Add_MouseEnter({ | |
| $This.Content.FontSize = "17" | |
| }) | |
| $Button.Add_MouseLeave({ | |
| $This.Content.FontSize = "16" | |
| }) | |
| $Button.Add_Click({ | |
| New-Variable -Name WPFMessageBoxOutput -Value $($This.Content.Text) -Option ReadOnly -Scope Script -Force | |
| $Window.Close() | |
| }) | |
| $Window.FindName('ButtonHost').AddChild($Button) | |
| } | |
| # Add buttons | |
| If ($ButtonType -eq "OK") | |
| { | |
| Add-Button -Content "OK" | |
| } | |
| If ($ButtonType -eq "OK-Cancel") | |
| { | |
| Add-Button -Content "OK" | |
| Add-Button -Content "Cancel" | |
| } | |
| If ($ButtonType -eq "Abort-Retry-Ignore") | |
| { | |
| Add-Button -Content "Abort" | |
| Add-Button -Content "Retry" | |
| Add-Button -Content "Ignore" | |
| } | |
| If ($ButtonType -eq "Yes-No-Cancel") | |
| { | |
| Add-Button -Content "Yes" | |
| Add-Button -Content "No" | |
| Add-Button -Content "Cancel" | |
| } | |
| If ($ButtonType -eq "Yes-No") | |
| { | |
| Add-Button -Content "Yes" | |
| Add-Button -Content "No" | |
| } | |
| If ($ButtonType -eq "Retry-Cancel") | |
| { | |
| Add-Button -Content "Retry" | |
| Add-Button -Content "Cancel" | |
| } | |
| If ($ButtonType -eq "Cancel-TryAgain-Continue") | |
| { | |
| Add-Button -Content "Cancel" | |
| Add-Button -Content "TryAgain" | |
| Add-Button -Content "Continue" | |
| } | |
| If ($ButtonType -eq "None" -and $CustomButtons) | |
| { | |
| Foreach ($CustomButton in $CustomButtons) | |
| { | |
| Add-Button -Content "$CustomButton" | |
| } | |
| } | |
| # Remove the title bar if no title is provided | |
| If ($Title -eq "") | |
| { | |
| $TitleBar = $Window.FindName('TitleBar') | |
| $Window.FindName('StackPanel').Children.Remove($TitleBar) | |
| } | |
| # Add the Content | |
| If ($Content -is [String]) | |
| { | |
| # Replace double quotes with single to avoid quote issues in strings | |
| If ($Content -match '"') | |
| { | |
| $Content = $Content.Replace('"',"'") | |
| } | |
| # Use a text box for a string value… | |
| $ContentTextBox = [Windows.Markup.XamlReader]::Load((New-Object -TypeName System.Xml.XmlNodeReader -ArgumentList $ContentTextXaml)) | |
| $Window.FindName('ContentHost').AddChild($ContentTextBox) | |
| } | |
| Else | |
| { | |
| # …or add a WPF element as a child | |
| Try | |
| { | |
| $Window.FindName('ContentHost').AddChild($Content) | |
| } | |
| Catch | |
| { | |
| $_ | |
| } | |
| } | |
| # Enable window to move when dragged | |
| $Window.FindName('Grid').Add_MouseLeftButtonDown({ | |
| $Window.DragMove() | |
| }) | |
| # Activate the window on loading | |
| If ($OnLoaded) | |
| { | |
| $Window.Add_Loaded({ | |
| $This.Activate() | |
| Invoke-Command $OnLoaded | |
| }) | |
| } | |
| Else | |
| { | |
| $Window.Add_Loaded({ | |
| $This.Activate() | |
| }) | |
| } | |
| # Stop the dispatcher timer if exists | |
| If ($OnClosed) | |
| { | |
| $Window.Add_Closed({ | |
| If ($DispatcherTimer) | |
| { | |
| $DispatcherTimer.Stop() | |
| } | |
| Invoke-Command $OnClosed | |
| }) | |
| } | |
| Else | |
| { | |
| $Window.Add_Closed({ | |
| If ($DispatcherTimer) | |
| { | |
| $DispatcherTimer.Stop() | |
| } | |
| }) | |
| } | |
| # If a window host is provided assign it as the owner | |
| If ($WindowHost) | |
| { | |
| $Window.Owner = $WindowHost | |
| $Window.WindowStartupLocation = "CenterOwner" | |
| } | |
| # If a timeout value is provided, use a dispatcher timer to close the window when timeout is reached | |
| If ($Timeout) | |
| { | |
| $Stopwatch = New-object System.Diagnostics.Stopwatch | |
| $TimerCode = { | |
| If ($Stopwatch.Elapsed.TotalSeconds -ge $Timeout) | |
| { | |
| $Stopwatch.Stop() | |
| $Window.Close() | |
| } | |
| } | |
| $DispatcherTimer = New-Object -TypeName System.Windows.Threading.DispatcherTimer | |
| $DispatcherTimer.Interval = [TimeSpan]::FromSeconds(1) | |
| $DispatcherTimer.Add_Tick($TimerCode) | |
| $Stopwatch.Start() | |
| $DispatcherTimer.Start() | |
| } | |
| # Play a sound | |
| If ($($PSBoundParameters.Sound)) | |
| { | |
| $SoundFile = "$env:SystemDrive\Windows\Media\$($PSBoundParameters.Sound).wav" | |
| $SoundPlayer = New-Object System.Media.SoundPlayer -ArgumentList $SoundFile | |
| $SoundPlayer.Add_LoadCompleted({ | |
| $This.Play() | |
| $This.Dispose() | |
| }) | |
| $SoundPlayer.LoadAsync() | |
| } | |
| # Display the window | |
| $null = $window.Dispatcher.InvokeAsync{$window.ShowDialog()}.Wait() | |
| } | |
| } |
Wauw, cool message boxes, thank you so much. Only minor suggestion to include default icons for information,warning and error messages would be nice, so I don’t need to get an external image somewhere..but now I’m just whining. Keep up your great posts, much appreciated!
I’d like to try this out but I’m not seeing a link to download the code.
Use a desktop browser, the code is embedded as a Github gist which you can’t see from Twitter
Yep, using a browser. I think my company’s network may be blocking some things so I will try again later. Thanks.
Here is the link: https://gist.github.com/SMSAgentSoftware/0c0eee98a673b6ac34f5215ea6841beb
Brilliant!!
This is a great help!! Is there a way to force the WPF window to open in front of other windows? I find sometimes it pops up behind another so the user misses the message.
Thanks
Andy
That’s interesting, the $this.activate() line should take care of that. Another way to do it is to set the topmost property of the window, so set $window.topmost = $true just after the window object is created, then set it back to false in the $window.Add_loaded event methods otherwise the window will stay permanently on top of all other windows.
Thanks Trevor, I will give that a go.
could you please tell me that , where exactly in the code need to be put.
Sorry I am beginner
AWESOME script!!! I love this as I am able to use it to create a popup message for users when they first log in to our new Windows 10 machines which have OneDrive that auto-configures itself in the background.
One thing I would like to know is where would I place the lines “$window.topmost = $true” and “$window.Add_loaded” in the script to keep the window on top until the time has elapsed? I have a few scripts that run at first log in that I do not want to cover this message.
Nice thank you.
But have problem, it works on Powershell ISE, but on console return some error. it seem don’t load the function
have you an idea?
Hi Billy, what error do you get?
I got these error with the console : https://imgur.com/a/G502o (Sorry my windows is in Frenchglish. it say New-Object : the [System.Windows.Controls.Image] is not found )
But none when i use Powershell ISE
Are you using the latest version of the script? This was an issue with the first release but I corrected it to include loading the required libraries in the PS console. The current Gist is working fine for me.
I’m getting the same thing. Works fine in IDE, not on console. Just updated the function from the Gist to be sure.
Attempting to perform the InitializeDefaultDrives operation on the ‘FileSystem’ provider failed.
New-Object : Cannot find type [System.Windows.Controls.Image]: verify that the assembly containing this type is loaded.
At \\path\Users\user\Desktop\_WORKSPACE\PS_InputBox\SoftwareInstall.ps1:495 char:10
+ $Image = New-Object System.Windows.Controls.Image
+ ~~~~~~~~~~~~~~~~~~~~~~~~~~~~~~~~~~~~~~~~
+ CategoryInfo : InvalidType: (:) [New-Object], PSArgumentException
+ FullyQualifiedErrorId : TypeNotFound,Microsoft.PowerShell.Commands.NewObjectCommand
Hey Sam, that’s not the function that’s the issue, but your additional code. You need to add the required assemblies for WPF before you create any WPF objects, ie Add-Type -AssemblyName PresentationFramework,PresentationCore,WindowsBase
Hey, thanks for the fast reply! I’ve got everything working thanks to your help, and I made a post on the PDQ Deploy forum on how you enabled me to accomplish what I needed to accomplish. I gave you credit, and referenced back to this page so others can gain from this awesome tool. Thanks again! -Sam
https://support.pdq.com/hc/en-us/community/posts/360000338492-TIP-Custom-Install-Dialog-Prompt-with-Proceed-Wait-timer-for-user
Hmm yes this one ? https://gist.github.com/SMSAgentSoftware/0c0eee98a673b6ac34f5215ea6841beb#file-new-wpfmessagebox
Yep. What PS / OS / .Net version are you using?
Powershell : 5.1.15063.726
OS : Windows 10 1703 or 1607
.net : release 0x000707fe (4607098) (think is .NET4.0)
That’s .Net 4.7. Minimum 4.5 is required. Can’t reproduce the issue myself on those specs…
Hello,
I’m trying to replicate your tutorial “Upgrading using an OS upgrade task sequence” and the PS script are not applying..
Where can I add this script or what exactly do I need to in order to make this “New-WPFMessageBox” PowerShell function run successfully ? (sorry I’m a newbie).
Greetings.
Perhaps this comment belongs on the other post then. The scripts and an example task sequence are included in the download.
This is great, Anyway you could add a drop down menu option that outputs the result?
Do you mean like the PSSession Error example with the expander box?
Probably bad wording, I mean a combo box with a list of variables where the user selects one and then the result is set as the variable. eg. I have a ts server and want users to select the location they’re at.
Sure, I just added an example for you in the custom WPF content section 🙂
Thanks so much that worked perfectly, now I just need to workout how I can add checkboxes and output multiple variables and it will be useful for a few other of my projects. 🙂
Feel free to contact me on the About page with your requirements and I can try to help 🙂
I like this! Is there anyway to supply hex colour codes rather than the .net built in one?
You could remove the dynamic parameters in the function where colours are used and instead add a regular parameter of the same name. Then you should be able to specify hex codes as well.
Thanks Trevor will give it a go!
Also something I have played with is keeping the Message Box Function in its own script, then .sourcing it so you don’t need to paste the code in each of the other scripts
e.g. My end of task sequence notification does:
$ScriptPath = $MyInvocation.MyCommand.Path
$ScriptDir = Split-Path -Parent $ScriptPath
Set-Location $ScriptDir
. “.\WPFNotify.ps1”
New-WPFMessageBox -Content $RTB -Title “Upgrade (Almost) Complete” -TitleFontSize 24 -TitleBackground MidnightBlue
Does that work for a non-admin user?
Yes, as long as the user has read rights over the location the script is running from (and its running under their context)
Will this work on Windows 7?
Yes, if you have .Net 4.5 and a recent PS version
I can confirm that @PAUL “HARF” HARFIELD’s suggestion works. It’s a tidier way to manage the function from one just one file.
Trevor, I think your tool and your examples are marvellous. I will have to study your tool properly so I can replace my current, limited-capability vbs-hta tool.
You included a dropdown list example but not a simple input box example. Am I going to discover how to use it for that as I study the tool more or is it not something you have provided for?
I did find a couple of what I believe are typos in your examples.
Example 12 Windows 10 BSOD-style error
New-WPFMessageBox @Params -Content = “The script …
had to be changed to
New-WPFMessageBox @Params -Content “The script …
Example 27 [the final example]
Second variation [OnLoaded code]
I had to change the bracketing in this
and remove the final }) after the New-WPFMessageBox line
so it ended up as
$OnLoadedCode =({
# Spin up a powershell instance and run the code
$PowerShell = [powershell]::Create()
$PowerShell.AddScript($Code)
$PowerShell.AddArgument($UI)
$PowerShell.BeginInvoke()
})
New-WPFMessageBox -Title “Test-Connection Log Window” -Content $ChildElement -OnLoaded $OnLoadedCode
Thanks for mentioning the typos! I will update it. I don’t have any example for an input box, but that certainly could be done.
Hi Graham, would you mind posting the full script. I can’t get the basic “Dynamic” code working. I’d be grateful for the help.
Ah, the Xaml code gets stripped by WordPress…grrr. Here’s the missing Xaml code:
[XML]$Xaml = @”
<StackPanel xmlns=”http://schemas.microsoft.com/winfx/2006/xaml/presentation” xmlns:x=”http://schemas.microsoft.com/winfx/2006/xaml” >
<TextBox ScrollViewer.VerticalScrollBarVisibility=”Auto” ScrollViewer.HorizontalScrollBarVisibility=”Auto” Name=”TextBox” Width=”400″ Height=”200″ Text=”” BorderThickness=”0″ FontSize=”18″ TextWrapping=”Wrap” FontFamily=”Arial” IsReadOnly=”True” Padding=”5″/>
<Button Name=”Button” Content=”Begin” Background=”White” FontSize=”24″ HorizontalAlignment=”Center” Cursor=”Hand” />
</StackPanel>
“@
Trevor, thank you for your prompt reply. That worked great. Nice coding. Gonna look through the rest of your site for other golden nuggets such as this.
Will this work within a PXE environment during a task sequence? The boot image does have Powershell and .net 4.7 loaded. I can get the messages to work no problem on my desktop but they don’t appear during the my task sequence. Running the script doesn’t create any errors in the TS environment, it just pauses for a bit then moves on as if it ran fine without anything appearing.
I wanted to add, I did discover if I just run New-WPFMessageBox -Content “I’m a WPF Object!” the message box pops up without issue in PXE. However if I add anything else at all to it, even just doing New-WPFMessageBox -Content “I’m a WPF Object!” -Title “Custom Message Box” it fails to display.
Great function, was looking for this for a while :)…just one issue untill now…I can’t seem to get one or more new lines in the messagebox…it keeps putting it on one line. Even with `n…any thoughts on this?
Try html hex codes, or [System.Environment]::NewLine
Hi, Is there a way to Format the message content text with carriage Returns and linefeeds, if the text is stored in a variable?
Yes, try either html hex codes, or [Environment]::NewLine
Even still, trying both HTML codes and [Environment]::NewLine is not working. Have you figured out a way to force it to work?
I’m leaving this here since I can’t hit reply on Zachary’s comment
I fied this by using this in my strings:
Can’t get newline to work, neither with HTML codes () nor [Environment]::NewLine or [System.Environment]::NewLine
works fine for a newlinw
use inside the string
HI there, great stuff, however I’m failing to get the advance example working. Also the [XML]$Xaml section seems to be empty, is this correct?. I could do with the script , if you have time…
Hi Tony, the script is on Github: https://gist.github.com/SMSAgentSoftware/0c0eee98a673b6ac34f5215ea6841beb
BTW all , adding “ ” (removing the double quotes) works well for adding a newline in a variable with a string value.
This is very useful. How might I include the 10 minute timer and the ability to loop the script after the ten minutes if the “Ask me again” button is pressed?
Is there a way to center the text in the body of the message box?
Awesome tutorial .
Please tell me script for displaying message box with count down time as message.
Thank you
I’m using $CRLF = “ ” and inserting this into my variables to create a newline
Is there a way to make it mandatory to fill out a textbox or other field before you can close the popup by pressing okay button?
cheers
james
Can anyone tell me why i get this error when running this code? Basically if i add multiple different type of objects such as textbox, listbox etc together, i can only run the popup once, if i run it again i get this error. I’ve tried adding the line: $Window.FindName(‘ContentHost’).Children.Clear() above line 386 with no luck.
Thanks
James
Exception calling “AddChild” with “1” argument(s): “Specified element is already the
logical child of another element. Disconnect it first.”
At C:\Windows\scopeConfig\test scripts\test scripts\IncidentLevel.ps1:386 char:13
+ $Window.FindName(‘ContentHost’).AddChild($Content)
+ ~~~~~~~~~~~~~~~~~~~~~~~~~~~~~~~~~~~~~~~~~~~~~~~~~~
+ CategoryInfo : NotSpecified: (:) [], MethodInvocationException
+ FullyQualifiedErrorId : InvalidOperationException
Add-Type -AssemblyName PresentationFramework
# Display the message
$incidentNote = “”
# Define the location list
$Array = @(
“Low Level – System useable”
“Medium Level – System Partially Down”
“High Level – System Down”
)
# Create a stackpanel container
$StackPanel = New-Object System.Windows.Controls.StackPanel
# Create a combobox
$ComboBox = New-Object System.Windows.Controls.ComboBox
$ComboBox.ItemsSource = $Array
$ComboBox.Margin = “10,10,10,0”
$ComboBox.Background = “White”
$ComboBox.FontSize = 16
# Create a textblock
$TextBlock = New-Object System.Windows.Controls.TextBlock
$TextBlock.Text = “Select the Incident Severity”
$TextBlock.Margin = 10
$TextBlock.FontSize = 16
# Create a 2nd textblock
$TextBlock2 = New-Object System.Windows.Controls.TextBlock
$TextBlock2.Text = ”
Incident Notes”
$TextBlock2.Margin = 10
$TextBlock2.FontSize = 16
#Create a text input field
$textInput = New-Object System.Windows.Controls.TextBox
$textInput.DesiredSize.Height = 40
$textInput.Margin = 10
$textInput.FontSize = 16
# Assemble the stackpanel
$TextBlock, $ComboBox, $TextBlock2, $textInput | foreach {
$StackPanel.AddChild($PSItem)
}
$Params = @{
#Content = $StackPanel
Content = $StackPanel
Title = “Incident Severity”
TitleFontSize = 20
TitleBackground = ‘Red’
TitleTextForeground = ‘White’
Sound = ‘Windows Exclamation’
Timeout = $popUpTimer
}
While(($WPFMessageBoxOutput -eq “OK”) -and ($incidentNote -eq “”)) {
New-WPFMessageBox @Params
$Severity = $ComboBox.SelectedValue
$Severity
$incidentNote = $textInput.Text
$incidentNote
}
Having exactly the same issue when tryring to re-open the window after a delay button has been pressed.
Any solution found
what to change if i want window at top left corner ?
how to make video play repeatedly ..
cheers
Is there a way to get this message box to pop up on a remote pc?
You would need to run it on the remote pc and in the context of the logged-on user
Is there a way, to ensure that the message box will be in front of other windows?
It seems like you and I converged on solving a similar problem! Check out https://github.com/dm3ll3n/AnyBox. More of the process is abstracted away, but you do lose a bit of control with the AnyBox. Nice work with this!
Hey that’s a great solution! And a nice way of adding additional content to the box using cmdlets.
I really like your work on this. I wanted to use this to show a dialog with a message like “Operation in progress, please wait” but using OnLoaded and OnClosed wasn’t really working with the type of work and error management I was trying to achieve. So I did those 2 little modifications to enable the window to be shown while my code continues executing and then choose when I want to hide it back.
New paramter:
# Code for Passing back the window variable (and consequently, not wait for the window to be closed)
[Parameter(Mandatory=$false,Position=14)]
[switch]$PassThru
New displaylines:
#Display the window and pass back the $window variable if Passthru is requested
if($PassThru.IsPresent){
$window.Show() | Out-Null
return $window
}else{
$null = $window.Dispatcher.InvokeAsync{$window.ShowDialog()}.Wait()
}
Additionnaly, using the messagebox like that broke the usage of OnClosed because the codee steps out of the functions and loses the value of OnClosed and when it goes back to execute the Add_Closed, Invoke-Command throws an error.
I fixed it by also changing the following code:
$Window.Add_Closed({
If ($DispatcherTimer)
{
$DispatcherTimer.Stop()
}
Invoke-Command $OnClosed
})
by:
$window | Add-Member -NotePropertyName OnClosed -NotePropertyValue $OnClosed
$Window.Add_Closed({
If ($DispatcherTimer)
{
$DispatcherTimer.Stop()
}
Invoke-Command $This.OnClosed
})
Nice find, thanks!
Hey!
having problem ruunig this on Win7 stations.
the line:
“$null = $window.Dispatcher.InvokeAsync{$window.ShowDialog()}.Wait()”
getting error in ISE:”Unexpected token ‘{‘ in expression or statement.”
Powershell 3.0
.Net 4.5.1
Any idea?
Thanks.
You might need to update the Powershell version
Hi Trevor! Im really nub in PS, wanna to use your messagebox. Before I used (Get-ADComputer -SearchBase “OU=Informacijas Tehnologiju Departaments,OU=xxxxx,OU=xx,OU=Computers,OU=xxx,DC=xxx,DC=local” -Filter *).Name | Foreach-Object {Invoke-Command -ComputerName $_ {msg * “Hello. Please smile! :)”}} But your messagebox is marvelous! How do I change standart msg command with messagebox?
Hi! Great post. Thanks! I’ve been using some of your examples in my environment. I can’t figure out how I can add a countdown in or under a text block. Just some text and then a countdown from 60 to 0.
I tried with the example of using stackpanels but it didn’t work. Also, I found your post about timers but couldn’t combine it with the messageboxes. https://smsagent.blog/tag/powershell-wpf-timer/
Any suggestions?
The countdown timer issue is solved. I just wanted to get back to you and anyone else who is interested in using this functionality.
I found an example script at http://blog.dbsnet.fr/countdown-in-a-powershell-gui thatdid exactly what I wanted, so kudos to this guy!
Put this at the top of the script to call the necessary assemblies.
# Load the necessary .NET assemblies to run this script
Add-Type -AssemblyName PresentationFramework,System.Drawing,PresentationCore,System.Windows.Forms
A little part of the messagebox function is changed to stop the countdown timer when closing the window. Otherwise you get weird results when you run the script more than once in a PS ISE session.
# Stop the dispatcher and countdown timer if exists when closing the window
If ($OnClosed)
{
$Window.Add_Closed({
If ($DispatcherTimer)
{
$DispatcherTimer.Stop()
$CountdownTimer.Stop()
}
Invoke-Command $OnClosed
})
}
Else
{
$Window.Add_Closed({
If ($DispatcherTimer)
{
$DispatcherTimer.Stop()
$CountdownTimer.Stop()
}
})
}
Then I used a stackpanel to show some text and a countdown timer. Here is the code to do this, it should follow under the messagebox function of Trevor’s beautiful example script.
# Set Timeout
$MessageTimeout = 60
# Add a textblock
$TextBlock1 = New-Object System.Windows.Controls.TextBlock
$TextBlock1.Text = “Unable to complete the upgrade to Windows 10 1809 when running on battery power. Please connect an AC adapter now.”
$TextBlock1.TextWrapping = [System.Windows.TextWrapping]::Wrap
$TextBlock1.FontSize = “14”
$TextBlock1.Margin = “0,10,0,10”
# $TextBlock1.TextAlignment = “Center”
# $TextBlock1.VerticalAlignment = “Center”
# $TextBlock1.HorizontalAlignment = “Center”
# Add a textblock
$TextBlock2 = New-Object System.Windows.Controls.TextBlock
$TextBlock2.Text = “The upgrade process will continue when the countdown ends.”
$TextBlock2.TextWrapping = [System.Windows.TextWrapping]::Wrap
$TextBlock2.FontSize = “14”
$TextBlock2.Margin = “0,10,0,10”
# $TextBlock2.TextAlignment = “Center”
# $TextBlock2.VerticalAlignment = “Center”
# $TextBlock2.HorizontalAlignment = “Center”
# Add a textbox for countdown
$TextBox1 = New-Object System.Windows.Controls.TextBox
$TextBox1.Name = “Countdown”
$TextBox1.Text = “$MessageTimeout”
$TextBox1.TextWrapping = [System.Windows.TextWrapping]::Wrap
$TextBox1.FontSize = “18”
$TextBox1.Foreground = “Red”
$TextBox1.Margin = “0,10,0,10”
$TextBox1.BorderThickness = “0”
$TextBox1.TextAlignment = “Center”
# $TextBox1.VerticalAlignment = “Center”
# $TextBox1.HorizontalAlignment = “Center”
# Countdown is decremented every second using a timer
$CountdownTimer=New-Object System.Windows.Forms.Timer
$CountdownTimer.Interval = 1000
$CountdownTimer.Add_Tick({fn_CountDown})
$CountdownTimer.Start()
Function fn_CountDown {
$TextBox1.Text -= 1
If ($TextBox1.Text -eq 0) {
$CountdownTimer.Stop()
}
}
# Create a stackpanel container to store all the content pieces in
$Stackpanel = New-Object System.Windows.Controls.Stackpanel
$Stackpanel.Width = 500
$Stackpanel.Margin = “20,10,20,10”
$Stackpanel.VerticalAlignment = “Center”
$Stackpanel.AddChild($Image1)
$Stackpanel.AddChild($TextBlock1)
$Stackpanel.AddChild($TextBlock2)
$Stackpanel.AddChild($TextBox1)
# Display the message
New-WPFMessageBox -Content $Stackpanel -ContentTextForeground Black -Title “Running On Battery” -TitleFontSize 24 -TitleBackground Orange -TitleTextForeground White -Sound ‘Windows Unlock’ -Timeout $MessageTimeout
how to just have it run code if yes is pressed or no if that is pressed?
i found it in the all the reading thanks
I cannot get any carriage return/new line to work. Can you provide an example?
I have tried and cannot get carriage return or new line to work. Can you provide short example?
Is it possible to insert a hyperlink inside the window?
Yes, you need a RichTextBox for that
Could you plz provide an example
Big work have been done by you!!!
Is it possible to show the window in foreground?
This is an awesome template, and really encourages admins to interact with users. Like others, I wanted to add a new line to the message box and after googling came back to this page however the examples of a new line were already interpreted by the browser so to save other folks time simply add the following characters in you string for a new line:
… ha! the browser must have already made that into a new line, lets see if I can spell it out, please convert the words to text with no spaces
ampersand hashtag xa semicolon
or view the page’s source and search for $CRLF
Hello Trevor I am creating a box to enter a new password for a defined user. The problem that I am having is that I am able to click the default OK button if the box is blank. I am not sure how to change this with the section.
# Create a text box
$TextBox = New-Object System.Windows.Controls.TextBox
$TextBox.Text = “Enter A Password for the User”
$TextBox.Padding = 5
$TextBox.Margin = 5
$TextBox.BorderThickness = 0
$TextBox.FontSize = 16
$TextBox.Width = “NaN”
$TextBox.IsReadOnly = $True
#Create A Password Prompt
$MaintenancePWPrompt = New-Object System.Windows.Controls.PasswordBox
$MaintenancePWPrompt.Width = 200
$MaintenancePWPrompt.HorizontalAlignment = “center”
# Assemble controls into a stackpanel
$StackPanel = New-Object System.Windows.Controls.StackPanel
$StackPanel.AddChild($TextBox)
$StackPanel.AddChild($PWPrompt)
# Using no rounded corners as they do not stay true when the window resizes
New-WPFMessageBox -Content $StackPanel -Title “$SectionTitle” -TitleBackground Slateblue -TitleFontSize 20 -Sound ‘Windows Unlock’ -CornerRadius 0
Set-LocalUser -Name “User1” -Password $PWPrompt.SecurePassword -AccountNeverExpires -PasswordNeverExpires $true -UserMayChangePassword $false -ErrorAction Stop
A great post, thank you.
A couple of changes would allow this to be saved and used as a .psm1 module:
Line 304: Change “-Scope Script” to -Scope Global
New line 481: Add “Export-ModuleMember -Function New-WPFMessageBox -Variable WPFMessageBoxOutput”
These changes allow the $WPFMessageBoxOutput variable to be used in the calling script.
Thank you for your hard work. I love the script and all the wonderful examples you provided!
I’m trying to use the message box as an progress dialog box, while my login script is running. I’ve simplified your last example by eliminating the Button control and code:
. ((Split-Path $PSCommand -Parent)) + “WPFMessageBox.ps1″)
# XAML code for WPFMessageBox
[XML]$Xaml = @”
“@
# Create the WPF object from the XAML code
$ChildElement = [Windows.Markup.XamlReader]::Load((New-Object -TypeName System.Xml.XmlNodeReader -ArgumentList $xaml))
# Create a synchronised hashtable and add elements to it
$UI = [System.Collections.Hashtable]::Synchronized(@{})
$UI.ChildElement = $ChildElement
$UI.TextBox = $ChildElement.FindName(‘TextBox’)
$OnLoadedCode = {
Param($UI)
$UI.TextBox.Dispacher.Invoke({
$UI.TextBox.Text += “`n” + “Login script version $version”
$UI.TextBox.Text += “`n” + “Logged in $(Get-Date)”
$UI.TextBox.Text += “`n” + “OneDrive for Business sync drive found at `”$env:OneDriveCommercial`””
$UI.TextBox.ScrollToEnd()
})
}
New-WPFMessageBox -Title “Login Script” -Content $ChildElement -OnLoaded $OnLoadedCode -Timeout 5
The message box shows up, with only the title line and OK button, but it doesn’t display any of my status messages. I also get the following error message:
You cannot call a method on a null-valued expression.
At C:\utils\test-script.ps1:29 char:5
+ $UI.TextBox.Dispacher.Invoke({
+ ~~~~~~~~~~~~~~~~~~~~~~~~~~~~~~
+ CategoryInfo : InvalidOperation: (:) [], RuntimeException
+ FullyQualifiedErrorId : InvokeMethodOnNull
Any ideas where I’m going wrong?
I truly appreciate this article as it allows for a much nicer and newer message window style. Thank you.
Is it possible to use ServiceUI with this window style or only Visual Basic scripted windows as your other article explains?
https://smsagent.blog/2014/01/30/prompting-for-input-during-a-task-sequence/
I would like to pop a window to the user during a task sequence running as system.
Hi Trevor, I am using your super cool message box for system messages when starting our user environment. Everything worked fine for a while (not much users working because of Corona) but now there are some users with older Windows 10 installations and only PowerShell Version 2.
I get an error message like this “{ : UnexpectedToken “{” …
+ CategoryInfo : ParserError: ({:String) [], ParseException
To reproduce it you only have to start your powershell with “powershell -version 2”
Please help me, I googled hours and hours … nothing found
Hey,
When pressing a button, the message is not brought to the front…
Please help
WOW, just WOW
how to add hyperlinks for a text
Any idea why the media controller shows color in videos wrong when played thru this method WPF/powershell….but, when playing the file directly in windows media player colors are correct? In the WPF control, the colors are dimmed. White is grey for example.
Despite seeing several comments above with their solutions (sometimes), I just cannot get newline symbols included in my Content. I note that XmlReader does not handle them but XmlTextReader does. Is there something similar with XamlReader?
A typical Content string: $msg = “You are about to Install a Gateway to ” + “`n” + “an MSSQL database in a $envClass environment” + “`n” + “`n” + “Continue?”
In debug mode (VSCode), the $msg variable is correctly formatted.
By the time it is processed as
New-WPFMessageBox -Content $msg -……. all the newlines have disappeared.
I have tried them as imbedded .- $msg = “A message`nContinue?”
and as [Environment}::NewLine variables as well:
$nL = [Environment}::NewLine
$msg = “A message” + $nL + “Continue?”
Can anyone help?