Using USB media for a Standalone OS deployment is a great idea – you have greater storage capacity than a DVD, and the read speed is quicker, resulting in easier and quicker deployments. But what if your SCCM server is a VM? You can’t physically connect a USB storage device to the server, but you can use USB passthrough on your Virtual Host. This is available in Hyper-V on Windows Server 2012 R2, and since ESXi4.1 on VMWare. However, since vSphere 5.0, you can use also use a ‘client-connected’ USB device. This means if you don’t have access to the physical host your VM is running on, maybe it’s in a cloud datacenter, on another geographical site, or you’re just feeling lazy, you can still passthrough a USB device from your client computer to the VM – a very useful feature indeed!
Add a USB Controller
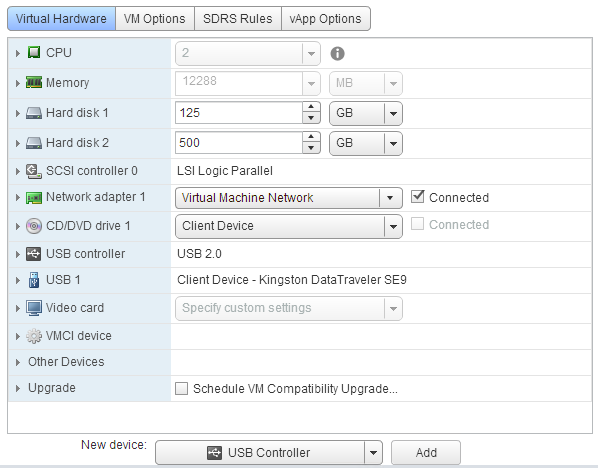
The first thing you need to do is add a USB controller to your VM. Edit the settings of your VM, go to ‘New Device’ and add the ‘USB Controller’. Click OK to save the settings.
(Screenshots from vSphere Web Client)
Add the USB Device
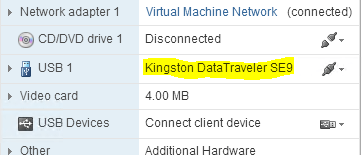
Then in the ‘Summary’ page of the VM, in the ‘VMWare Hardware’ section, you’ll see ‘USB Devices’. Click ‘Connect client device’ and choose your locally connected USB storage device.
 Once connected, refresh the page and you’ll see the newly connected USB device.
 Create your Standalone Media

Now you can go to the VM and you’ll see the mapped USB device. You can go ahead and use the Task Sequence media wizard to create your USB Standalone media. Here’s mine from Disk Management after creating the media:
